
Mandalas are circular designs with repeating shapes that often hold spiritual significance. These beautiful drawings have long been used to facilitate meditation in the Indian and Tibetan religions of Hinduism and Buddhism. Many other religions, including Christianity and Taoism, have also incorporated mandalas into their spiritual practices. The word mandala comes from the Sanskrit word which means sacred circle. Many people find drawing mandalas to be a very centering and expressive activity.
This post may contain affiliate links and I may earn a small commission when you click on the links at no additional cost to you. As an Amazon Affiliate, I earn from qualifying purchases. You can read my full disclaimer here.

Calming Benefits of Mandalas
The primary objective of creating a mandala is to promote serenity and reflection. These beautiful geometric designs have been known to help reduce stress and anxiety in both children and adults because of their meditative nature.
Colouring and designing mandalas is a relaxing exercise that can help children refocus and express their creativity. Studies have also shown that the act of repeating the geometric shapes and patterns in the mandalas can be particularly beneficial over other types of drawings[1].
The process of creating mandalas is as important as viewing the finished work. The intent of both stages is to center the mind and body, which is why they are an ideal tool for meditation. It is believed that the shapes and colours that children use to create their mandala art is a reflection of their inner state. It is a beautiful expression of their emotions.
Related: Splatter Art With Essential Oils – Anxiety Art
Our new Zentangle course is here!
Are you looking for an effective way to destress and unwind? Are you trying to find ways to incorporate self-care and creativity into your life? Would you like to introduce the Zentangle Method to your children or students but you’re not sure how?
If you answered yes to any of these questions then you’re going to love our new course. If you haven’t had a chance yet to watch the course overview video, check it out below!
Now back to mandalas 🙂

Chanel and Chloé personally enjoy watching their patterns spring to life on the page as they draw each line and watch their mandala grow. However, using mandala colouring pages can be equally as beneficial. I’ve often used mandala colouring pages in my classroom on rainy days to help my students redirect their energy creatively. I’ve included 2 mandala colouring pages to get you started.
Chanel and I created these mandala colouring pages for you to enjoy, so please do not copy, use, or redistribute our designs without our consent. We would love for you to share our colouring pages, with our permission, or you can provide a link to our website where the colouring can be accessed directly. Thank you and happy creating!
We also created some blank mandala tracers to help you with the creative process. You don’t have to trace plates or use fancy tools to get started with your mandala. Just print our mandala tracers, trace one, and start experiencing the magic!
Related: Flextangles – Paper Toys (free printable templates)

As with all expressive art, you should encourage the child to start with a line and see where it takes them. However, for those children who require a springboard to get started, Chanel created a handout with simple patterns that they can use to get their juices flowing. I’ve noticed that even though children are given a template, once they get into a rhythm they begin to venture out and modify the premade designs or they begin creating their own designs without even realizing it.
Here’s our YouTube video that will show you how to draw a mandala step-by-step.
Prep time: 5 minutes
Appropriate for all ages
For today’s art piece you’ll need:
- Blank mandala tracers
- Sharpie fine point markers/Sharpie ultra fine point
- Blank paper/cardstock
- Eraser
- Mandala patterns (optional)
- Ruler (optional)
- Watercolor paint, pencil crayons, or markers for colouring (optional)
Step 1 – Gather your materials
- Print your tracers. If you’re using the pre designed patterns to get you started, have them ready too.

Step 2 (optional) – Trace your blank mandala tracer onto a piece of paper
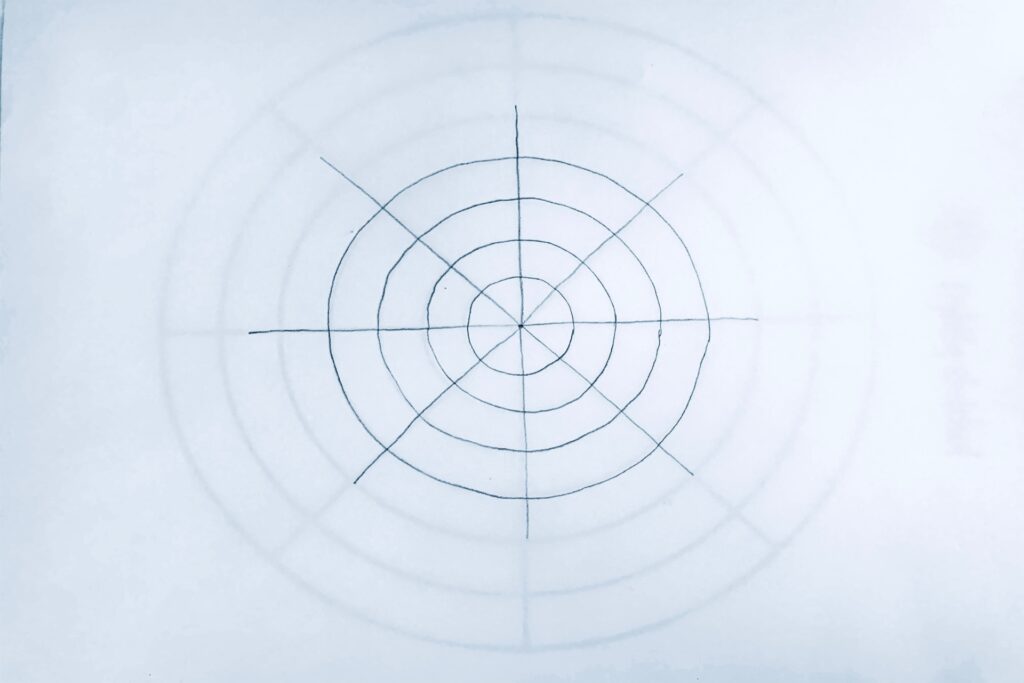
- You can trace one of the blank mandala tracers onto a piece of paper if you’d like to add more flexibility to your design. Tracing your blank mandala onto paper will allow you to create designs that can extend beyond 1 ring, without having lines go through it.
- You can trace as many rings as you’d like depending on how big you’d like to make your mandala. In the picture below, we’ve traced 4 out of the 7 rings.
- If you are drawing your designs directly onto the blank mandala tracer you can skip to step #3
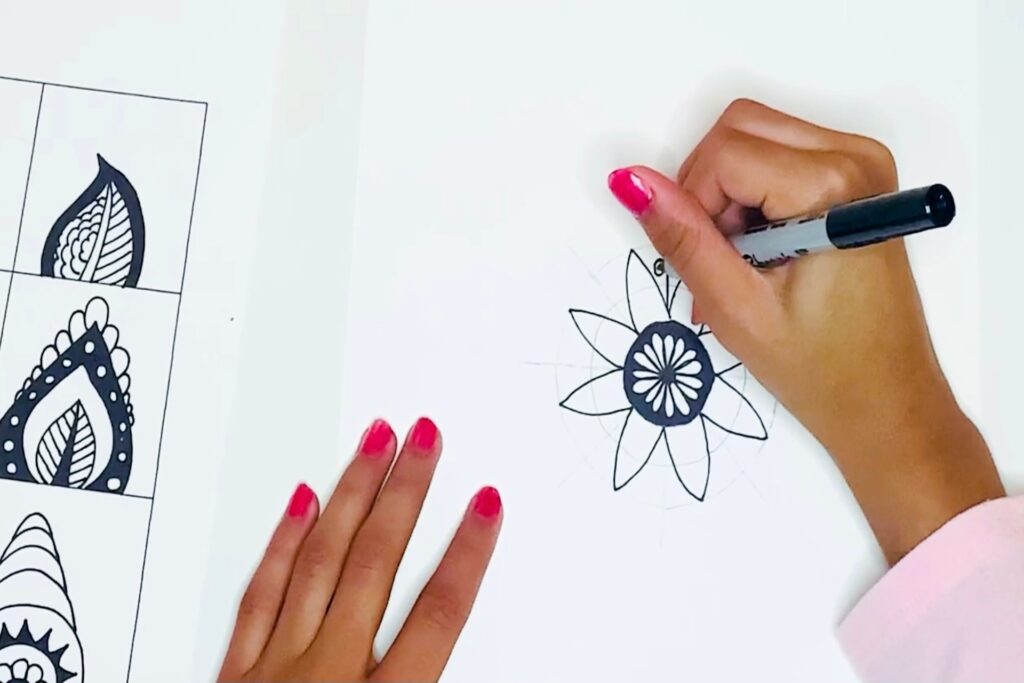
Step 3 – Draw one shape in a ring around your centre point
- You can draw your mandala using a thin sharpie or pen, however younger children might be more comfortable drawing in pencil first and then tracing over their designs afterwards.
- You could create a ring of triangles, flower petals, circles, any shape that inspires.

Step 4 – Continue drawing concentric rings of shapes
- Draw a variety of shapes (ovals, petals, triangles, circles, you can even leave a ring blank)
Step 5 – Relax and let flow take over
- You can put on some calming music or something classical, while you work on mandalas.
Step 6 – Continue to fill in your Mandala Rings
- You can choose to fill in all of the rings completely or just the first few.
- Continue to add lines and patterns to your mandela
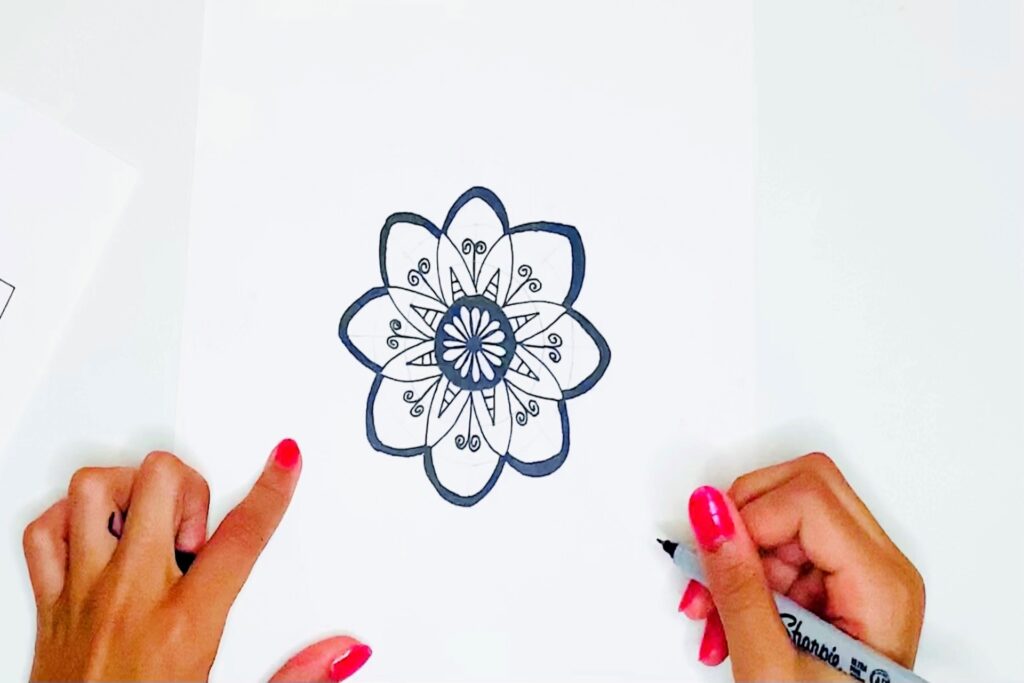
Step 7 – Trace over your design using a thin sharpie or pen
- If you drew your mandala in pencil, you can trace over your mandala in black or you can use different coloured thin sharpies as well.
- You can try using pens/sharpies with different weights, so you can create lines that are thicker or thinner. Varying the line weight will add depth and interest to your mandala.
- If you’ve already drawn your madela in pen/sharpie you can skip to step #8.
Step 8 – Erase your pencil Lines
- Once you have completely traced over your pencil designs in sharpie, it’s time to erase the pencil lines that we drew in Step #2
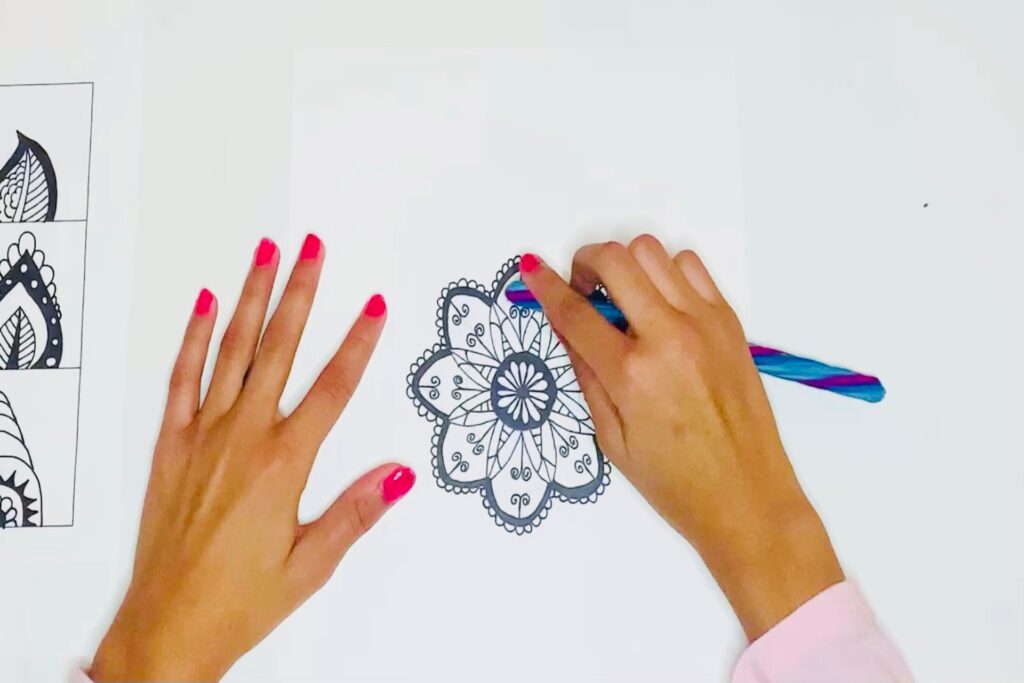
Step 9 – Colour Your Mandala (Optional)
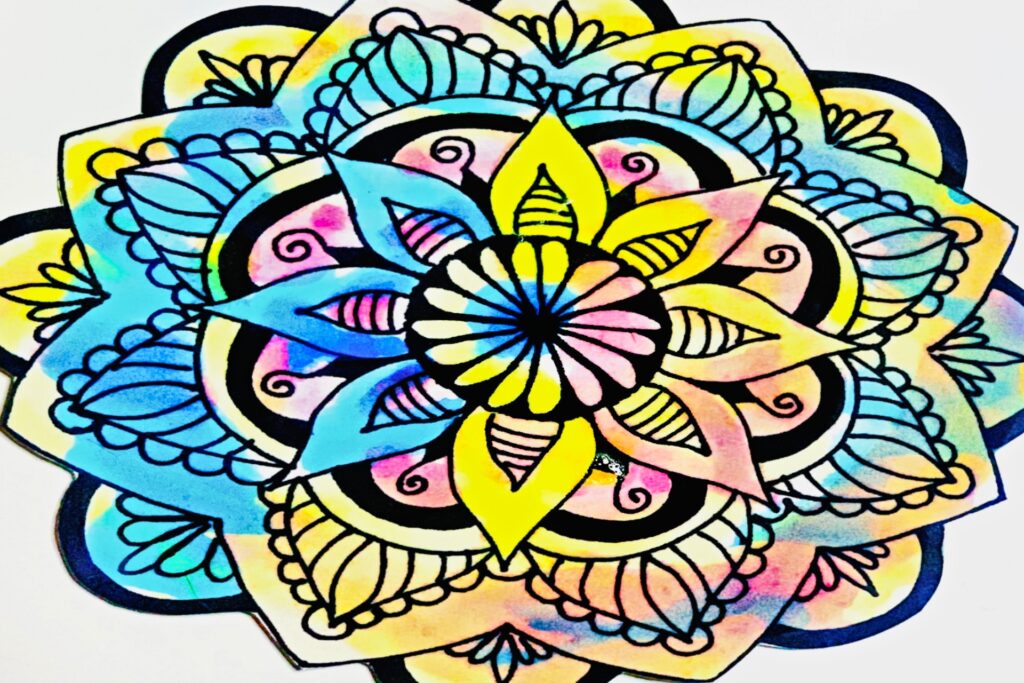
- You can colour your mandala using pencil crayons, markers, watercolour paint, or any colouring tools that you have available. Here is one that Chloé painted using watercolour paint.
You can photocopy your design so you can colour it in many times or give copies to your family.
I hope that you have fun completing this activity! I’d love to hear from you – questions, comments, or any art activity that you’re looking for. Please also let me know how your masterpieces turn out.
References
- “How Coloring a Mandala Can Relieve Stress.” Verywell Mind, www.verywellmind.com/coloring-mandalas-as-a-meditation-technique-4161160#:~:text=People%20who%20color%20mandalas%20often. Accessed 27 Feb. 2021.


5 thoughts on “How to Draw a Mandala Step by Step”
Pingback: Splatter Art With Essential Oils - Anxiety Art - Lightly Sketched
I love your site, it is so colorful! This is a great step by step tutorial and it looks relaxing. 😊
Mrs. Accountable
Thank you so much!!!
I love this and want to try myself!
That’s great! If you do try it, let me know how it turns out.
Comments are closed.